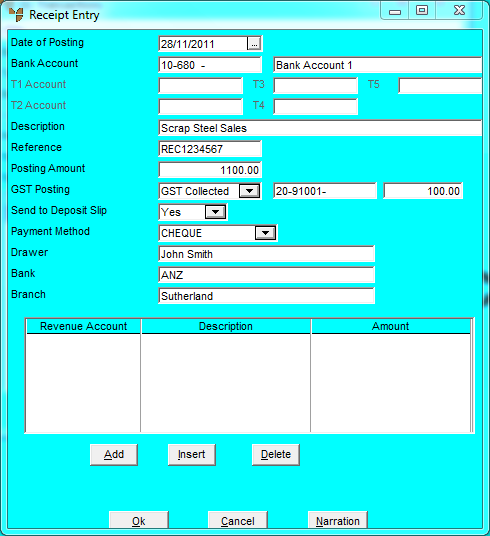
When you enter receipts in a GL transaction batch, you need to dissect the receipt amounts to the correct revenue accounts in the General Ledger. You do this on the Revenue Entry screen.
Refer to "GL Transactions - Receipt Entry".
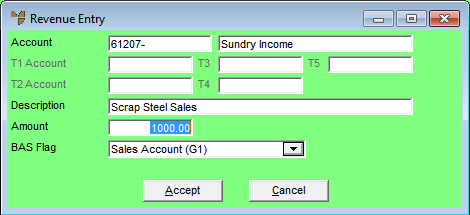
If you selected to add, insert or edit a dissection, Micronet displays the Revenue Entry screen.
|
|
Field |
Value |
|
|
Account |
Enter the account to post the receipt transaction to, or press Tab or Enter to select from a list of accounts. |
|
|
T1, T2, T3, T4, T5 Account |
If T accounts are enabled in your system, select a T1, T2, T3, T4 and/or T5 account to be associated with the (credit) revenue posting. If you enter an incorrect account, Micronet displays a list of all available T accounts. |
|
|

|
Technical Tip If T accounts are enabled, you must select them when posting the credit side of receipt transactions. If you don't select a T account, Micronet prompts you to enter one. |
|
|
Description |
Micronet displays the description of the transaction. This can be edited for each account posting to include relevant information relating to that particular GL posting. |
|
|
Amount |
Enter the amount of the receipt entry transaction. If you enter an amount less than the Posting Amount, e.g. to dissect a receipt among various accounts, Micronet displays the remaining unallocated amount of the receipt. Continue to enter receipt accounts until the entire amount is allocated. |
|
|
BAS Flag |
Micronet displays the BAS flag entered against the selected receipt account. However, you can change this if required to process the transaction with an alternative BAS section, e.g. to G14- No GST. |
Micronet saves the dissection and redisplays the Receipt Entry screen showing all dissections for the receipt.